[In English]
Para utilizar Arduino y LabVIEW conjuntamente, existe un interfaz llamado LIFA (LabVIEW Interface For Arduino) que permite conectarlos. Una sencilla búsqueda en Google devuelve mucha documentación de cómo hacerlo, aunque para mi gusto estos dos documentos proporcionados por National Instruments son suficientes:
- Cómo instalar en LabVIEW el LIFA Toolkit (en inglés)
- Cómo cargar el firmware LIFA en Arduino (en inglés)
El equipo con el que he trabajado tiene Windows 7, y la versión de LabVIEW es la 2009 SP1. Los únicos detalles a tener en cuenta son:
- Para poder cargar el firmware LIFA en Arduino es necesario descargarle un fichero que se encuentra en un directorio de C:\Archivos de Programa, donde se almacenen los datos de National Instruments. Por tanto, la cuenta de usuario Windows con la que se trabaja debe tener acceso a ese directorio (o quizás baste con obtener ese fichero en concreto, y guardarlo en otra ubicación del disco duro para usarlo posteriormente).
- Para cargar el firmware LIFA en Arduino es necesario que Windows lo haya detectado y le haya asignado un puerto. En mi equipo, a pesar de que los drivers de Arduino están instalados, intenta buscarlos fuera y tarda bastante en detectar el Arduino. Paciencia 🙂
- Para volver a trabajar con Arduino sin conexión con LabVIEW no hay que hacer nada especial: basta con cargarle el .ino que deseemos, como siempre.
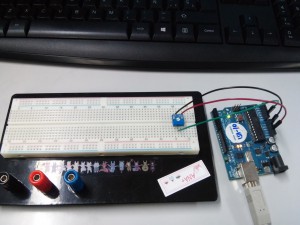
Una vez instalado LIFA en LabVIEW, resulta muy útil consultar los ejemplos que se incluyen en Toolkits and Modules/Embedded Development. Las fotos y el vídeo que incluyo al final de esta entrada muestran una adaptación del ejemplo de lectura de pines analógicos usando un potenciómetro de 1K.
Finalmente, he descubierto que LIFA ha sido sustituido por LINX. Puesto que la instalación de LIFA ha ido como la seda, y por el momento cubre lo que quiero hacer, voy a mantenerme fiel a LIFA 🙂
[En español]
If you want to connect Arduino and LabVIEW, you can use the LIFA interface (LabVIEW Interface For Arduino). A simple Google search returns a lot of information about how this can be done, but in my opinion these two National Instruments documents are enough:
The computer I have used is a Windows 7 platform with LabVIEW 2009 SP1. Some considerations about the installation process:
- In order to upload the LIFA firmware in Arduino, you need a file that can be found in a folder inside C:\Program Files, where NI data are stored. Therefore, your Windows user account should have permissions to access that folder (or maybe you just need to get that file by any other means, and then store it where you want).
- To upload the LIFA firmware in Arduino, Windows must first detect the microcontroller, and then assign a port to it. In my computer, despite that the Arduino drivers are loaded, Windows searches them again, so it spends a while until the Arduino is detected. Patience is a virtue 🙂
- You can go back to work with Arduino without LabVIEW connection without any special steps: just upload the .ino file you wish, as usual.
Once you have installed LIFA in LabVIEW, it is really useful to check the examples stored in Toolkits and Modules/Embedded Development. The photos and video at the end of this post show an adaptation of the example devoted to read analogic pins, using a 1K potentiomete.
Finally, I have discovered that LIFA has been replaced by LINX. Since LIFA has been installed like a charm, and up to this moment covers what I need to do, I will stay faithful to LIFA 🙂


