Scripting in gvSIG 2.1 + PostGIS

Facebooktwitterredditpinterestlinkedinmail


[In English]
gvSIG 2.0 y posteriores permiten crear una capa directamente desde una tabla de una base de datos PostgreSQL/PostGIS, incluso añadiéndoles una restricción SQL, es decir, con una claúsula WHERE sobre la tabla, de manera que uses únicamente las columnas que te interesen.

Sin embargo, yo necesitaba crear una capa a partir de una tabla incluyendo, en la restricción SQL, un FROM que me permitiera combinar diferentes tablas de mi BD. Para ello he utilizado la opción de scripting con Jython que ofrece gvSIG (en mi caso, en la versión 2.1).

[NOTA: gvSIG 1.12 también tiene un módulo de scripting, pero a) es menos potente, y b) no ha sido capaz de cargar el script que he escrito, la consola de Jython me indica que “no module named gvsig”]

El primer paso para poder trabajar con los scripts Jython es instalar el módulo de scripting en gvSIG, si no está instalado por defecto. A partir de ahí, ya se pueden crear y lanzar los scripts Jython que queramos desarrollar. No es el objetivo de esta entrada explicar con detalle la instalación y el manejo del entorno de scripting; para ello, consultar la documentación de scripting de gvSIG,  las entradas de scripting del blog de gvSIG, o esta entrada del blog másquesig. Como veréis, crear nuestros propios scripts abre muchísimas posibilidades a la hora de trabajar con gvSIG.

Para acceder a BDs en Jython se puede usar el paquete zxJDBC, que es un estándar desde la versión 2.1 de Jython; aquí se puede encontrar mucha información sobre el mismo, pero resumiendo:

  • Es útil para scripts aislados y sin necesidad de portabilidad.
  • Comunica dos estándares: JDBC, el estándar de acceso a bases de datos de Java, y DBI, el estándar de acceso a bases de datos de Python.

Sin embargo, no he conseguido hacer que funcionara. Posiblemente el problema es el que se comenta y soluciona aquí, relativo al classpath; sin embargo, sospecho que como la herramienta de scripting está “dentro” de gvSIG, la solución que proponen no funciona. Tampoco funciona esta variante que he encontrado.

Así que la solución ha sido trabajar directamente en Java. Lo primero ha sido descargar el driver JDBC para PostgreSQL de aquí; he escogido el JDBC 4 para PostgreSQL 9.1 y me ha ido bien.

Para lograr acceder a la BD y ejecutar sentencias SQL me he basado en la información encontrada en este enlace, este enlace, y este otro. El driver lo guardo en el directorio donde he instalado el gvSIG (no en el directorio que crea gvSIG), y en el script primero accedo a él, y luego lo cargo. Una vez tengo acceso a la BD, puedo ejecutar la sentencia SQL que desee, con lo que la potencia de las búsquedas es mucho mayor. La única condición es que esa búsqueda devuelva las coordenadas X e Y de los puntos que queremos insertar en la capa.
Este es el código básico que resuelve el acceso a la BD, la ejecución de la sentencia, y la creación de la nueva capa con los datos devueltos por la misma.


[En español]

gvSIG 2.0 and later allow to create a layer from a table in a PostgreSQL/PostGIS database, even adding a SQL constraint, that is, a WHERE clause on the table, so you can recover only the columns you need.

However, I wanted to create a layer from a table including, in the SQL constraint, also a FROM clause which allowed me to combine different tables in my DB. So I have used the scripting possibilities that, via Jython, offers gvSIG (in my case, I am working with gvSIG 2.1)

[NOTE: gvSIG 1.12 has a scripting module too, but a) it is not as powerful, and b) it could not load the script I have written, and the Jython console shows the message “no module named gvsig”]

The first step in order to write Jython scripts in gvSIG is to install the scripting module (if it is not installed by default). From there on, you can create and launch your own Jython scripts. It is out of the scope of this post to explain in detail the installation process and how to work with the scripting module; the interested reader may consult the gvSIG scripting documentation,  the gvSIG blog’s posts about scripting, or this post on blog másquesig. As you can see, creating our own scripts offers a lot of possibilities when we work with gvSIG.

For accessing databases using Jython you can use the zxJDBC package, which is a standard since version 2.1 of Jython; you can find here much more information about it, though, to cut a long story short (I love that song by Spandau Ballet 🙂 !!):

  • It is useful for scripts that work in an isolated manner and do not have to assure portability.
  • It is a link between two standards: JDBC, the Java standard for accessing databases, and DBI, the Python standard for the same task.

However, I couldn’t make it work. I would say that the problem is the one commented and solved here, due to classpath issues; however, I guess that, since the scripting module is “inside” gvSIG, the proposed solution does not work, neither does this variation I have found.

So I have used Java. First, you have to download the JDBC driver for PostgreSQL from here; I have chosen JDBC 4 for PostgreSQL 9.1 and it works fine.

In order to connect to the DB and then execute SQL sentences, I have used the information I found in this link, this link, and this other link.  I stored the driver in the directory where I have installed gvSIG (not in the directory created by gvSIG), then the script appends that path, and finally the driver is uploaded. Any SQL sentence can be executed, so the searches in the BD are much more flexible. The only restriction that must be taken into account is that the search returns the X and Y coordinates of the points we want to insert into the new layer. This is the basic code that access to the DB, executes the query, and creates a new layer with the returned data.


import sys
import os
from gvsig import *
from geom import *
from java.util import Properties

sys.path.append(“/home/anita/gvSIG-desktop/gvSIG-desktop-2.1.0/postgresql-9.1-903.jdbc4.jar”);
import org.postgresql.Driver as Driver

def main():
# Create the new layer
projection = currentView().getProjection()
newLayerSchema = createSchema()
newLayerSchema.append(“ID”,”INTEGER”)
newLayerSchema.append(“GEOMETRY”,”GEOMETRY”)
newLayerName = “/home/anita/YOUR_PATH
newLayer = createShape(newLayerSchema,newLayerName,CRS=projection,geometryType=POINT)

# Connect to the database
props = Properties()
props.put(“user”,YOUR_USER)
props.put(“password”,YOUR_PASSWORD)
db = Driver().connect(“jdbc:postgresql://localhost/YOUR_DB“, props)

# Get geometry info from database and insert it into the new layer
c = db.createStatement()
rs = c.executeQuery(“select table.id, ST_X(table.coordinatesxy),ST_Y(table.coordenatesxy) from YOUR_TABLES where YOUR_WHERE_CLAUSE“)
data = {}
while rs.next():
id = rs.getInt(1)
newX = rs.getObject(2)
newY = rs.getObject(3)
print(id,newX,newY)
newGeom = createPoint(newX,newY)
dbValues = {“ID”:id,”GEOMETRY”:newGeom}
newLayer.append(dbValues)
rs.close()
c.close()
db.close()

currentView().addLayer(newLayer)
newLayer.commit()

LabView + Arduino UNO

Facebooktwitterredditpinterestlinkedinmail


[In English]
Para utilizar Arduino y LabVIEW conjuntamente, existe un interfaz llamado LIFA (LabVIEW Interface For Arduino) que permite conectarlos. Una sencilla búsqueda en Google devuelve mucha documentación de cómo hacerlo,  aunque para mi gusto estos dos documentos proporcionados por National Instruments son suficientes:

El equipo con el que he trabajado tiene Windows 7, y la versión de LabVIEW es la 2009 SP1. Los únicos detalles a tener en cuenta son:

  • Para poder cargar el firmware LIFA en Arduino es necesario descargarle un fichero que se encuentra en un directorio de C:\Archivos de Programa, donde se almacenen los datos de National Instruments. Por tanto, la cuenta de usuario Windows con la que se trabaja debe tener acceso a ese directorio (o quizás baste con obtener ese fichero en concreto, y guardarlo en otra ubicación del disco duro para usarlo posteriormente).
  • Para cargar el firmware LIFA en Arduino es necesario que Windows lo haya detectado y le haya asignado un puerto. En mi equipo, a pesar de que los drivers de Arduino están instalados, intenta buscarlos fuera y tarda bastante en detectar el Arduino. Paciencia 🙂
  • Para volver a trabajar con Arduino sin conexión con LabVIEW no hay que hacer nada especial: basta con cargarle el .ino que deseemos, como siempre.

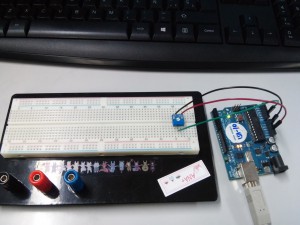
Una vez instalado LIFA en LabVIEW, resulta muy útil consultar los ejemplos que se incluyen en Toolkits and Modules/Embedded Development. Las fotos y el vídeo que incluyo al final de esta entrada muestran una adaptación del ejemplo de lectura de pines analógicos usando un potenciómetro de 1K.

Finalmente, he descubierto que  LIFA ha sido sustituido por LINX. Puesto que la instalación de LIFA ha ido como la seda, y por el momento cubre lo que quiero hacer, voy a mantenerme fiel a LIFA 🙂

[En español]

If you want to connect Arduino and LabVIEW, you can use the LIFA interface  (LabVIEW Interface For Arduino). A simple Google search returns a lot of information about how this can be done, but in my opinion these two National Instruments documents  are enough:

The computer I have used is a Windows 7 platform with LabVIEW 2009 SP1. Some considerations about the installation process:

  • In order to upload the LIFA firmware in Arduino, you need a file that can be found in a folder inside C:\Program Files, where NI data are stored. Therefore, your Windows user account  should have permissions to access that folder (or maybe you just need to get that file by any other means, and then store it where you want).
  • To upload the LIFA firmware in Arduino, Windows must first detect the microcontroller, and then assign a port to it. In my computer, despite that the Arduino drivers are loaded, Windows searches them again, so it spends a while until the Arduino is detected. Patience is a virtue 🙂
  • You can go back to work with Arduino without LabVIEW connection without any special steps: just upload the .ino file you wish, as usual.

Once you have installed LIFA in LabVIEW, it is really useful to check the examples stored in Toolkits and Modules/Embedded Development. The photos and video at the end of this post show an adaptation of the example devoted to read analogic pins, using a 1K potentiomete.

Finally, I have discovered that LIFA has been replaced by LINX. Since LIFA has been installed like a charm, and up to this moment covers what I need to do, I will stay faithful to LIFA 🙂

20150113_20554720150113_205535

European Robotics Week 2014: yeah :)!!

Facebooktwitterredditpinterestlinkedinmail

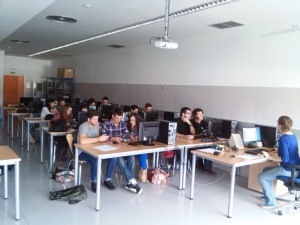
El pasado sábado 29 de Noviembre celebramos el Taller Lego NXT en la Escuela de Ingenierías de la UMA. Yo me lo pasé muy bien :), y por eso quiero agradecer el interés y las ganas de participar y aprender de todos los asistentes.

Our Lego NXT Workshop was hold on Saturday 29 November at Escuela de Ingenierías (UMA). I really had a good time :), and I am very grateful for the interest and the desire to learn that all the participants showed.

20141129_111215 20141129_133241_redu 20141129_121709

Free chapter of “Simultaneous Localization and Mapping for Mobile Robots: Introduction and Method”

Facebooktwitterredditpinterestlinkedinmail

Capítulo gratis del libro Simultaneous Localization and Mapping for Mobile Robots: Introduction and Method, Juan-Antonio Fernández-Madrigal y José-Luis Blanco-Claraco (Universidad de Málaga),  IGI Global (2013)

Free chapter of  Simultaneous Localization and Mapping for Mobile Robots: Introduction and Method, Juan-Antonio Fernández-Madrigal and José-Luis Blanco-Claraco (Universidad de Málaga),  IGI Global (2013)

Maps for Mobile Robots: Types and Construction


Lego NXT Workshop at Málaga University (European Robotics Week 2014)

Facebooktwitterredditpinterestlinkedinmail

lego

Dentro de las actividades de la Semana Europea de la Robótica 2014, el próximo Sábado 29 de Noviembre llevaremos a cabo un Taller Lego NXT, dirigido a ingenieros con conocimientos básicos de programación. Más información aquí.

We celebrate the European Robotics Week 2014 next Saturday 29th November with a Lego NXT Workshop, targeted to engineers with a basic programming knowledge. More info here [in Spanish]

PostgreSQL/PostGIS + gvSIG + Windows XP

Facebooktwitterredditpinterestlinkedinmail


[In English]
Finalmente, he instalado PostgreSQL/PostGIS y gvSIG en una máquina virtual Windows XP (creo que ya me quedan pocas combinaciones por probar :P). Estos son los puntos principales a tener en cuenta:

  • Primero he instalado gvSIG 2.1.0.2252 RC2. Los ráster los carga bien; en algunos me ha dado problema con la carga con teselado, pero se cargan bien sin esta opción.
  • La versión de PostgreSQL que he usado es la 9.3, y la versión de PostGIS es la 2.1. He instalado lo mínimo posible; la instalación de Apache y phpPgAdmin ha dado error (olvidé apuntarlo :(); he permitido que se actualicen las variables de entorno GDAL_DATA,POSTGIS_GDAL_ENABLED_DRIVERS, y POSTGIS_ENABLE_OUTDB_RASTERS.
  • En esta versión, PostGIS se añade como una extensión una vez creada nuestra base de datos.
  • Una cosa curiosa ha sido que, al cargar datos en la base de datos desde un fichero .csv, saltaba un error debido a que no tenía permisos de lectura en el fichero. Buscando un poco, he encontrado este foro en el que se explicaba la solución (¡gracias!): copiar el fichero .csv en un directorio visible como “Documentos Compartidos”
  • Para poder usar las opciones de scripting de gvSIG y conectarme con jython a la base de datos, he guardado el .jar con el driver de PostgreSQL (postgresql-9.1-903.jdbc4.jar) en el directorio gvSIG creado en la instalación, y ha ido todo estupendamente 🙂


[En español]

Finally, I have installed PostgreSQL/PostGIS and gvSIG on a Windows XP virtual machine (I would say that there are not much more possibilites I could try :P). These are the main issues to take into account:

  • Firstly, I have installed gvSIG 2.1.0.2252 RC2. Raster files are, in general, properly loaded; some files have shown errors if loaded with tiling options, but they load ok if tiling is not used.
  • Then I have installed PostgreSQL 9.3 and PostGIS 2.1. My installation was minimal; anyway, Apache and phpPgAdmin installation failed (I did not write down which were the errors :(); along the installation process, I updated enviroment variables GDAL_DATA, POSTGIS_GDAL_ENABLED_DRIVERS, and POSTGIS_ENABLE_OUTDB_RASTERS.
  • In this version, PostGIS is added as an extension, once we have created our database.
  • A funny issue was that, when I tried to load my data into the database from a .csv file, an error arose because I had not reading permissions on that file. Doing a little research, I found this forum which explained how to fix it (zanks!): just copy the .csv in a visible folder like “Shared Documents”.
  • In order to use the scripting utilities of gvSIG, and connecting from a jython script to the database, I have placed the .jar file with the PostgreSQL driver (postgresql-9.1-903.jdbc4.jar) in the gvSIG folder (the one created when gvSIG is installed), and everything went fine 🙂

PostgreSQL/PostGIS + Debian Wheezy

Facebooktwitterredditpinterestlinkedinmail


[In English]
He tenido que instalar PostgreSQL/PostGIS, esta vez en una máquina con Debian Wheezy. Estas son las diferencias respecto a la instalación en Xubuntu 14.04:

  • La versión de  PostgreSQL que hay disponible en el Synaptic para este Debian es la 9.1. Estos son los paquetes instalados, comparados con los que instalé en la versión 9.3:
    1. postgresql-server-dev-9.1
    2. postgresql-doc-9.1
    3. postgresql-client-9.1
    4. postgresql-client-common
    5. postgresql-9.1-postgis
    6. postgresql-9.1-postgis-2.1-scripts: no está en el repositorio.
    7. libpq-dv: no está en el repositorio.
    8. postgresql-common: ya estaba instalada.
    9. libpq5: ya estaba instalada.
    10. postgresql-doc: no está en el repositorio, pero está instalada postgresql-doc-9.1
    11. postgresql-client: no está en el repositorio, pero está instalada postgresql-client-9.1
    12. libreoffice-base-drivers: no está en el repositorio, pero están instaladas libreoffice-base-core y libreoffice-base
    13. postgresql-contrib-9.1
    14. postgis: ya estaba instalada.
    15. postgresql-9.1: no está en el repositorio.
    16. postgresql
    17. liblwgeom: no está en el repositorio.
  • La versión de PostGIS en el repositorio es la 1.5.3-2. Esto implica que no se puede añadir directamente como extensión, sino que hay que crear una plantilla o template (que es una base de datos que alberga las funciones PostGIS). En este enlace y en este otro se puede encontrar ayuda muy útil; los pasos que yo he seguido para crear la template a partir de ellos son los siguientes:
    1.  Crear la plantilla
      1. sudo -u postgres createdb template_postgis
      2. sudo -u postgres psql -d template_postgis -c “UPDATE pg_database SET datistemplate=true WHERE datname=’template_postgis'”
      3. sudo -u postgres psql -d template_postgis -f /usr/share/postgresql/9.1/contrib/postgis-1.5/postgis.sql
      4. sudo -u postgres psql -d template_postgis -f /usr/share/postgresql/9.1/contrib/postgis-1.5/spatial_ref_sys.sql
    2. Crear la base de datos con dicha plantilla
      1. sudo -u postgres createdb -T template_postgis mibasedatos
        (pgAdmin debe estar cerrado, si no, da error indicando que otro usuario está utilizando template_postgis)


[En español]

I had to install PostgreSQL/PostGIS, though this time in a Debian Wheezy computer. These are the differences regarding to the installation in Xubuntu 14.04:

  • In  Debian Wheezy, Synaptic offers PostgreSQL 9.1. These are the packages I have installed, compared to those I installed in version 9.3:
    1. postgresql-server-dev-9.1
    2. postgresql-doc-9.1
    3. postgresql-client-9.1
    4. postgresql-client-common
    5. postgresql-9.1-postgis
    6. postgresql-9.1-postgis-2.1-scripts: not in Synaptic.
    7. libpq-dv:  not in Synaptic.
    8. postgresql-common: it is installed.
    9. libpq5: it is installed.
    10. postgresql-doc: not in Synaptic, but postgresql-doc-9.1
      is installed.
    11. postgresql-client: not in Synaptic, but postgresql-client-9.1
      is installed.
    12. libreoffice-base-drivers: not in Synaptic, but libreoffice-base-core and libreoffice-base are installed.
    13. postgresql-contrib-9.1
    14. postgis: it is installed.
    15. postgresql-9.1: not in Synaptic.
    16. postgresql
    17. liblwgeom: not in Synaptic.
  • The PostGIS version in Synaptic is 1.5.3-2. This means that it cannot be added directly as an extension, but as a template (i.e., a database that stores PostGIS functions).  In this this link and in this other you can find very useful information about how to create a template; using that information, these are the steps I have followed for creating my template:
    1.  Template creation
      1. sudo -u postgres createdb template_postgis
      2. sudo -u postgres psql -d template_postgis -c “UPDATE pg_database SET datistemplate=true WHERE datname=’template_postgis'”
      3. sudo -u postgres psql -d template_postgis -f /usr/share/postgresql/9.1/contrib/postgis-1.5/postgis.sql
      4. sudo -u postgres psql -d template_postgis -f /usr/share/postgresql/9.1/contrib/postgis-1.5/spatial_ref_sys.sql
    2. Database creation using that template
      1. sudo -u postgres createdb -T template_postgis mydatabase
        (pgAdmin must be closed; if not, an error arises noting that other user is using  template_postgis)

Preinstalled Nootrix ROS Indigo VM (Xubuntu, Windows 7)

Facebooktwitterredditpinterestlinkedinmail


[In English]
La máquina virtual es la de ROS Indigo Igloo 32 bits que ofrece preinstalada Nootrix y que puede descargarse aquí.

En Xubuntu 14.04, la he instalado en Virtual Box 4.3.10. Para no perder la costumbre ;), me han surgido algunos problemas, que he resuelto como sigue:

  • Los problemas de creación o cierre del fichero .vmdk han desaparecido forzando a que, en Virtual Box, la opción Archivos -> Preferencias -> General -> Carpeta predeterminada de máquinas  contenga el directorio donde está almacenado en el fichero .ova, en lugar de modificar ese path al instalar la máquina.
  • Una vez instalada la máquina correctamente, el que ha protestado ha sido Virtual Box. Afortunadamente, en el propio error se indicaba la solución, que efectivamente funciona: The VirtualBox Linux kernel driver (vboxdrv) is either not loaded or there is a permission problem with /dev/vboxdrv. Please reinstall the kernel module by executing
    ‘/etc/init.d/vboxdrv setup’
    as root. If it is available in your distribution, you should install the DKMS package first. This package keeps track of Linux kernel changes and recompiles the vboxdrv kernel module if necessary.

En Windows 7, la he instalado en Virtual Box 4.2.10.  Aparentemente, la instalación ha ido bien.


[En español]
I have chosen the 32 bits preinstalled virtual machine of ROS Indigo Igloo offered by Nootrix here.

Under Xubuntu 14.04 I have Virtual Box 4.3.10. Just for a change ;), some issues arose, and they were solved like that:

  • Problems related to creating or closing the  .vdmk file disappeared when I forced, in Virtual Box, that the folder in  Files -> Preferences -> General -> Predetermined machine folder  (I hope I have translated this properly, since my Virtual Box is in Spanish) is the same that the folder which stores de .ova file, instead of changing that path directly when the virtual machine is installed.
  • Once the virtual machine was properly installed,  Virtual Box did not feel comfortable 😉 Luckily, the error info showed also how to solve it (and it works):  The VirtualBox Linux kernel driver (vboxdrv) is either not loaded or there is a permission problem with /dev/vboxdrv. Please reinstall the kernel module by executing
    ‘/etc/init.d/vboxdrv setup’
    as root. If it is available in your distribution, you should install the DKMS package first. This package keeps track of Linux kernel changes and recompiles the vboxdrv kernel module if necessary.

On Windows 7, I used Virtual Box 4.2.10, and everything seems to be fine by now.